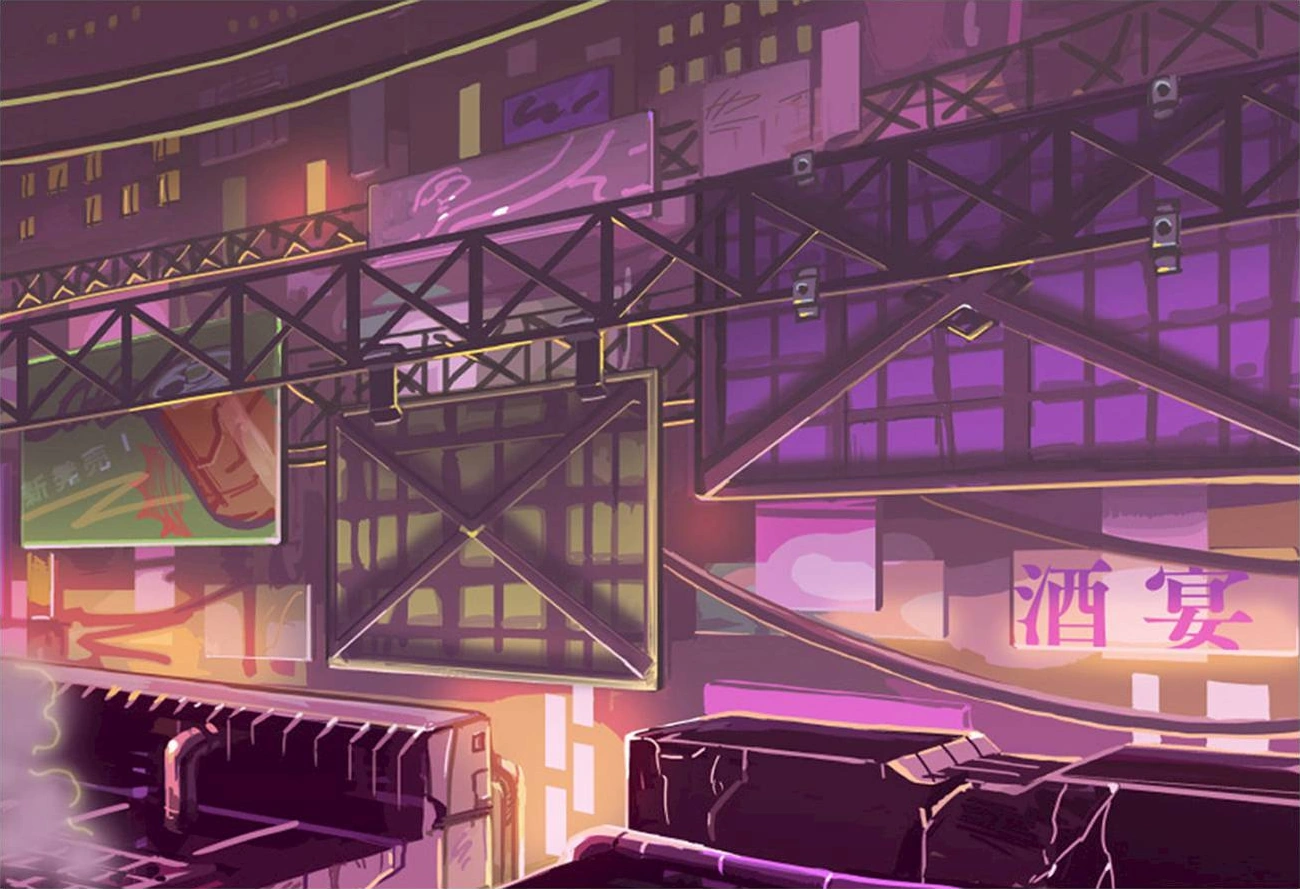
[[File:Sinner's_Row.png|thumb]]''Tonight, the pleasure quarter belongs to [[Zonda]]. As Gunvolt chases the lustful menace down, he crosses paths with an avenger...''- '''Flavor Text'''
[[File:Sinner's_Row.png|thumb]]''Tonight, the pleasure quarter belongs to Zonda. As Gunvolt chases the lustful menace down, he crosses paths with an avenger...''- '''Flavor Text'''
'''Sinner's''' '''Row''' (''Red-light'' ''District'' in Japan) is the location of a mission in ''[[Azure Striker Gunvolt]]'', codenamed "''Kaleidoscape''". Gunvolt must chase down Zonda, a dangerous adept of Sumeragi's that has slipped inside after defeating Zeno.
'''Moniqa:''' Sorry for pinging you in the middle of the night... Your target has fled into the sketchy side of a town nearby. You can thank the said target for taking Zeno out of the game. Proceed with extreme caution...
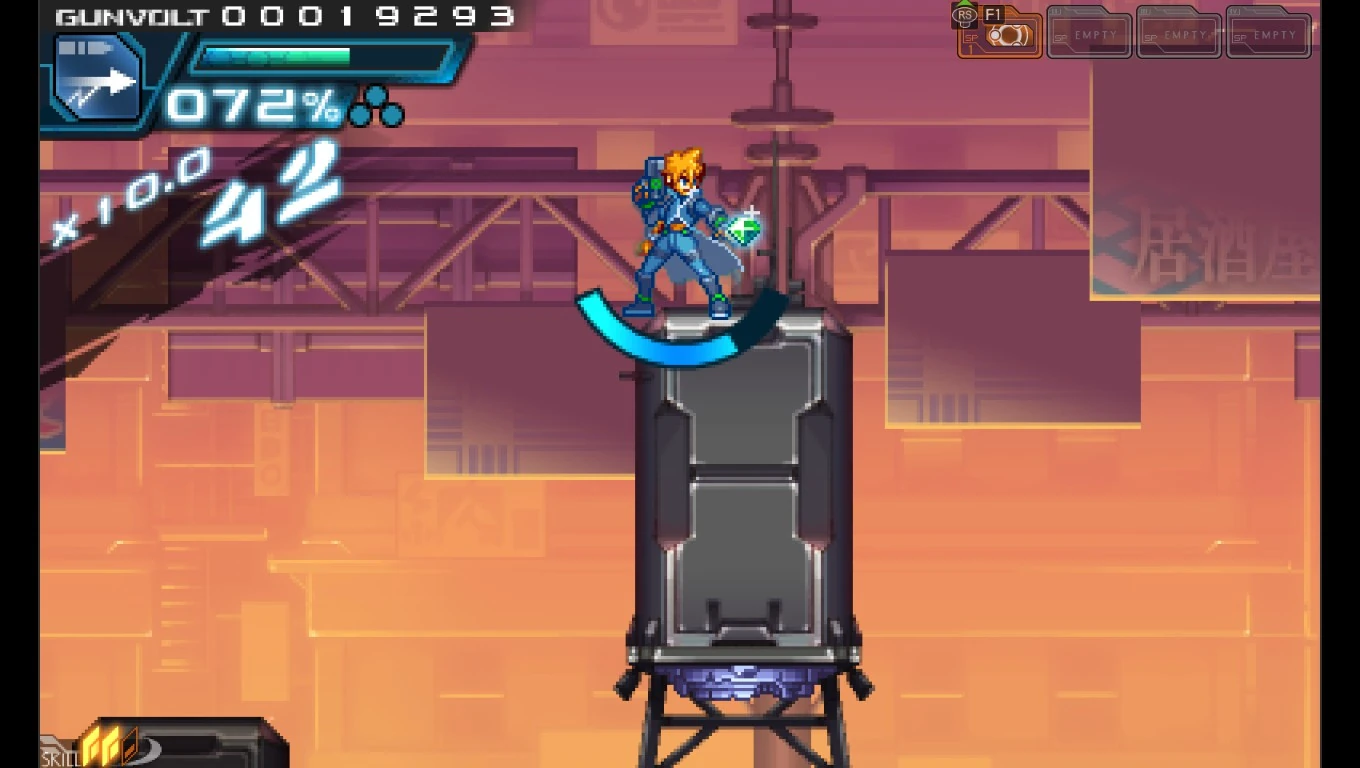
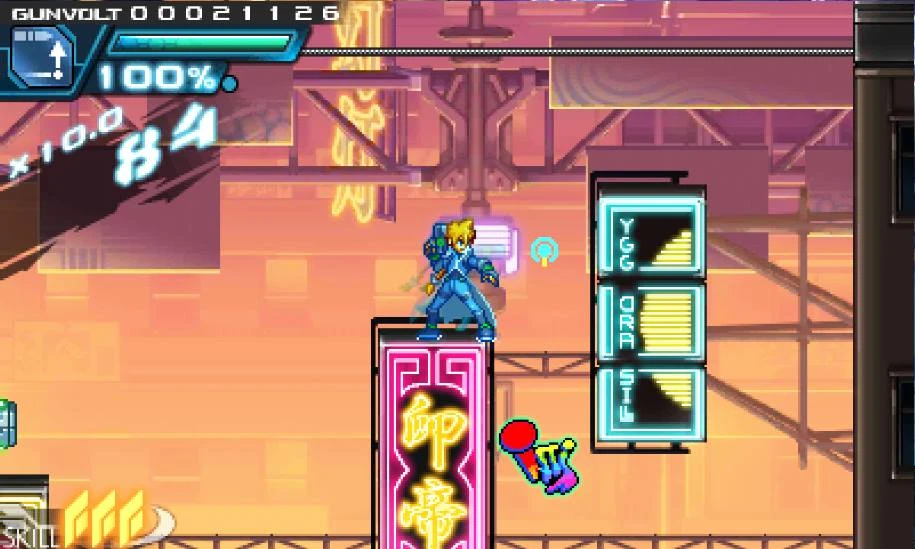
* The stage's main gimmick is the pink mirrors floating in midair, created by Zonda's septima. Using these mirrors, Zonda weaves a labyrinth of disconnected stage segments, featuring new enemy placements, gauntlet rooms, and even upside-down segments.
'''Sinner's''' '''Row''' (''Red-light'' ''District'' in Japan) is the location of a mission in ''[[Azure Striker Gunvolt]]'', codenamed "''Kaleidoscope''". Gunvolt must chase down Zonda, a dangerous adept of Sumeragi's that has slipped inside after defeating Zeno.
'''Moniqa:''' Sorry for pinging you in the middle of the night... Your target has fled into the sketchy side of a town nearby. You can thank the said target for taking Zeno out of the game. Proceed with extreme caution...
* The stage's main gimmick is the pink mirrors floating midair, created by Zonda's septima. Using these mirrors, Zonda weaves a labyrinth of disconnected stage segments, featuring new enemy placements, gauntlet rooms, and even upside-down segments.
** You can tell whether or not you chose the right path by Zonda screaming ''"Waga ai yo!" ''('''Lit.''' "''This is'' ''my LOVE!"'')
** You can tell whether or not you chose the right path by Zonda screaming ''"Waga ai yo!" ''('''Lit.''' "''This is'' ''my LOVE!"'')
−
*** This is easier in versions with in-stage dialogue because Zonda makes some very creepy commentary as you go through the stage.
+
*** This is easier in versions with in-stage dialogue due to Zonda's commentary.
* This stage features a lot of bottomless pits. Carefully navigate the rooftops using the neon signs as platforms, and be careful about the enemies that appear.
* This stage features a lot of bottomless pits. Carefully navigate the rooftops using the neon signs as platforms, and be careful about the enemies that appear.
−
* A number of cable launchers hang nearby large pits or gaps. Shock them with Flashfield to make them launch a wire that you can stand on. Just don't stand in front of them as they fire,ithurts.
+
* A number of cable launchers hang nearby large pits or gaps. Shock them with Flashfield to make them launch a wire that you can stand on. Just don't stand in front of them as they fire; or else you'll take damage.
−
==[[Copen "The AdeptSlayer"|'''Copen "The Adept Slayer"''']]==
+
==Boss: [[Copen "The Luminous Avenger iX"|Copen "The Adept Slayer"]]==
−
In the Stage'sending, you will find Zonda killed by a mysterious person who will be your opponent. He will mainly use weapons based on the specific bosses you've defeated sofar. Hedoesn'tusehisSpecialSkillandis the only bossthatisnotamember of SumeragioranAdept.
+
At the end of the stage, you will find Zonda killed by Copen, who will be your ''actual'' opponent. Depending on the previous three Sumeragi bosses you've defeated, Copen will use attacks based off of theirs. See [https://azurestrikergunvolt.fandom.com/wiki/Copen_%22The_Luminous_Avenger_iX%22#Special_Attacks this page] for more details on how to properly combat these attacks. At this point in the game, Copen will only use three of the below attacks based on the player's own trio of defeated bosses. However, which of these attacks he'll use, when, and how frequently, are completely up to RNG.
−
== '''Challenges''' ==
+
*'''Merak:''' Lazy Laser
+
*'''Carrera:''' Power Grab
+
*'''Jota:''' Arrogant Radiance
+
*'''Elise:''' Gorgon Gaze
+
*'''Viper:''' Blazing Bombers
+
*'''Stratos:''' Flesh Eater
+
+
Despite Doppler Desire being the move he acquires from [[Zonda]], he will not use this skill in Sinner's Row, likely because he hasn't had time to input it into his attack moveset yet.
+
+
==Jewel Location==
+
[[File:Jewel Sinner's Row.jpg|thumb|220x220px]]
+
After one of the enemy ambushes, climb up the tower-like structure by either gliding off the nearby floating platform or double jumping.
+
The Jewel rests at the top.
+
+
== Challenges ==
* '''Sleazy Breezy:''' Clear in 8 minutes or less. (Reward: Garnet x8)
* '''Sleazy Breezy:''' Clear in 8 minutes or less. (Reward: Garnet x8)
* '''Quick 'n' Dirty:''' Clear in 5 minutes or less. (Reward: Yellow Chalcedony x1)
* '''Quick 'n' Dirty:''' Clear in 5 minutes or less. (Reward: Yellow Chalcedony x1)
Line 28:
Line 52:
* '''Use Xyr Illusion:''' Clear using the shortest possible route. (Reward: Yellow Chacledony x1)
* '''Use Xyr Illusion:''' Clear using the shortest possible route. (Reward: Yellow Chacledony x1)
* '''Look, Ma!:''' Clear without activating any wire bridges. (Reward: Graym Extract 239 x1)
* '''Look, Ma!:''' Clear without activating any wire bridges. (Reward: Graym Extract 239 x1)
−
−
==Trivia==
==Trivia==
−
*[[File:ZondaSecretIcon.jpg|thumb|292px]]This stage contains a secret icon that can be uncovered by shooting it five times with Mizuchi, and when revealed it will set the player's Kudos to 1000. This icon is of [[Inti Creates]]' logo.
+
*[[File:ZondaSecretIcon.jpg|thumb|292px]]This stage contains a secret icon that can be uncovered by shooting it five times with Mizuchi, and, when revealed, it will set the player's Kudos to 1000. This icon is [[Inti Creates]]' logo.
−
−
−
−
−
−
−
−
−
=='''In-Mission Dialogue'''==
−
[[Sinner's Row/Script]]
−
=='''Gallery'''==
−
<gallery>
−
Zondsface.png|Stage select icon
−
Sinner's Row Backdrop.png|Stage select backdrop
−
sinner's row background mirror.png|One of the stage's backgrounds
Sinner'sRow (Red-lightDistrict in Japan) is the location of a mission in Azure Striker Gunvolt, codenamed "Kaleidoscape". Gunvolt must chase down Zonda, a dangerous adept of Sumeragi's that has slipped inside after defeating Zeno.
Briefing
Moniqa: Sorry for pinging you in the middle of the night... Your target has fled into the sketchy side of a town nearby. You can thank the said target for taking Zeno out of the game. Proceed with extreme caution...
Stage Composition
The stage's main gimmick is the pink mirrors floating in midair, created by Zonda's septima. Using these mirrors, Zonda weaves a labyrinth of disconnected stage segments, featuring new enemy placements, gauntlet rooms, and even upside-down segments.
You can tell whether or not you chose the right path by Zonda screaming "Waga ai yo!" (Lit. "This ismy LOVE!")
This is easier in versions with in-stage dialogue due to Zonda's commentary.
This stage features a lot of bottomless pits. Carefully navigate the rooftops using the neon signs as platforms, and be careful about the enemies that appear.
A number of cable launchers hang nearby large pits or gaps. Shock them with Flashfield to make them launch a wire that you can stand on. Just don't stand in front of them as they fire; or else you'll take damage.
At the end of the stage, you will find Zonda killed by Copen, who will be your actual opponent. Depending on the previous three Sumeragi bosses you've defeated, Copen will use attacks based off of theirs. See this page for more details on how to properly combat these attacks. At this point in the game, Copen will only use three of the below attacks based on the player's own trio of defeated bosses. However, which of these attacks he'll use, when, and how frequently, are completely up to RNG.
Merak: Lazy Laser
Carrera: Power Grab
Jota: Arrogant Radiance
Elise: Gorgon Gaze
Viper: Blazing Bombers
Stratos: Flesh Eater
Despite Doppler Desire being the move he acquires from Zonda, he will not use this skill in Sinner's Row, likely because he hasn't had time to input it into his attack moveset yet.
Jewel Location
After one of the enemy ambushes, climb up the tower-like structure by either gliding off the nearby floating platform or double jumping.
The Jewel rests at the top.
Challenges
Sleazy Breezy: Clear in 8 minutes or less. (Reward: Garnet x8)
Quick 'n' Dirty: Clear in 5 minutes or less. (Reward: Yellow Chalcedony x1)
Upside Downfall: Clear with a rank of B or higher. (Reward: Graym Culture x8)
Hard Rocker: Clear with a rank of S or higher. (Reward: Graym Extract 239 x1)
Last Man Standing: Clear with a rank of S+. (Reward: Graym Extract 239 x5)
Use Xyr Illusion: Clear using the shortest possible route. (Reward: Yellow Chacledony x1)
Look, Ma!: Clear without activating any wire bridges. (Reward: Graym Extract 239 x1)
Trivia
This stage contains a secret icon that can be uncovered by shooting it five times with Mizuchi, and, when revealed, it will set the player's Kudos to 1000. This icon is Inti Creates' logo.
